
To make a white background product photo, take a clear picture of the product, let an AI background remover cut it out, and fill the background with pure white. Save it as a JPG and the photo is ready for most online shops, including Amazon and Shopify. You don’t need a light box or a studio for most products.
This guide covers the marketplace rules worth knowing, the exact settings to use, and how to shoot products so the AI gets clean edges the first time.
Make white background product photos now: free, no sign-up, and your photos stay on your device.
Marketplace rules for white background product photos
Each marketplace sets its own rules, and they change from time to time, so always check the current guidelines in your seller account before you upload. These are the points that matter most:
| Marketplace | Background | Framing and size | What to do here |
|---|---|---|---|
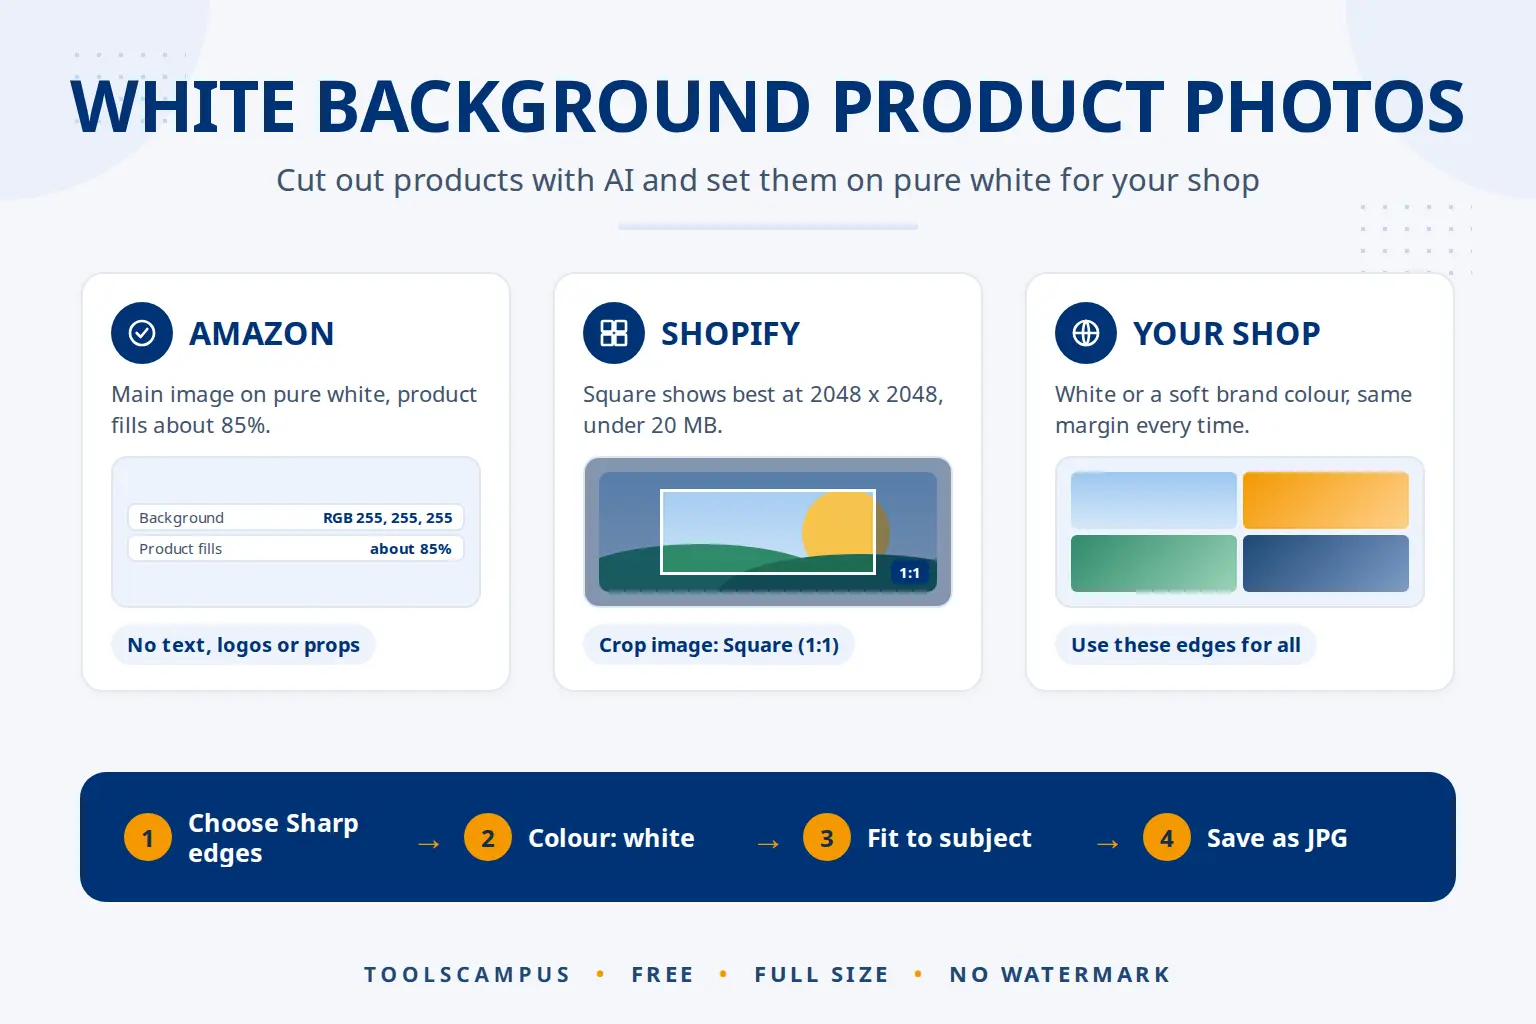
| Amazon (main image) | Pure white (RGB 255, 255, 255) | Product fills about 85% of the frame; no extra text, logos or props | Colour: white, Sharp edges, Fit to subject with a small margin, save as JPG |
| Shopify | Your choice; white keeps a store consistent | Square images display best at 2048 x 2048 pixels; files must be under 20 MB | Same shape and margin for every product, then crop to a square |
| Your own website or social shop | White or a soft brand colour | Same shape and margin across all products | Same edges for the whole batch with Use these edges for all photos |
The Shopify numbers come from Shopify’s help page on product media. Amazon’s image rules are in Seller Central, and the “pure white” rule usually applies to the main image only; your other images can show the product in use.
How to make a white background product photo (step by step)
- Open Remove background and add your product photos. JPG, PNG, WebP and iPhone HEIC work, up to 30 at a time.
- Choose Sharp edges. Boxes, bottles, shoes and electronics have hard outlines, and Sharp keeps them crisp.
- Check each photo with Show removed parts turned on. Fix missing or leftover bits with the Keep and Erase brushes.
- Under New background, choose Colour and pick white.
- Add a little Soft shadow if you want the product to look grounded instead of floating. Leave it at zero if the marketplace wants a plain background only.
- Under Size, choose Fit to subject and set Space around it so the product fills most of the picture with an even margin.
- Click Use these edges for all photos so every product in the batch gets the same edge settings, then check each photo.
- Save as JPG and click Download all to get them as a ZIP. Each file is named like
shoe (no background).jpg.
The result is full size and has no watermark, so it is fine for zoom on product pages.
Getting the product to fill the frame
Fit to subject trims the picture to the product and adds the margin you choose with Space around it. A small margin makes the product fill most of the image, which is what Amazon asks for. Try a value, look at the preview, and adjust until the product looks large with a little white space on every side.
Fit to subject follows the shape of the product, so a tall bottle gives a tall picture. If your shop needs square images:
- Shoot the product in the centre of the frame with some room on all sides.
- Remove the background with Size set to Whole photo, a white Colour background, and save as JPG.
- Open Crop image, choose Square (1:1), and drag the box so the product fills most of it.
- If the file is very large, shrink it with Resize image (for example to 2048 pixels wide for Shopify) and then Compress image for faster pages. Our guide on image sizes for a website explains why this matters.
How to shoot products for clean cut-outs
The better the photo, the less touching up you need afterwards:
- Use a plain background that contrasts with the product. A white mug on a dark table cuts out more cleanly than a white mug on a white table.
- Use soft, even light. Daylight from a window, or two lamps from the sides, avoids deep shadows that the AI may treat as part of the product.
- Keep the whole product in sharp focus. Blurry edges give blurry cut-outs.
- Leave space around the product. You can always crop later, but you can’t add back a cut-off corner.
- Shoot all products from the same height and distance. A matching set looks much more professional in a shop grid.
How the AI handles product photos, and when to fix it
The background remover uses an AI model that runs in your browser. It has learned from many example photos what a main subject looks like, and it marks every pixel as product or background. Products with clear outlines are its easiest job, which is why product photos often need no touch-ups at all.
On computers with a recent graphics card and a browser that supports WebGPU, the tool uses the Best model, which gives cleaner edges. Other devices use Standard, which leaves more small bits to clean up. For a shop catalogue, a computer is worth it.
Watch out for these cases, where the AI is most likely to slip:
- Glass and clear plastic. The background shows through, so the AI may remove parts of the product. Paint them back with Keep.
- White products on white. Similar colours confuse the AI. Reshoot on a darker surface if you can.
- Gaps and handles. The space inside a mug handle or between chair legs should be white. Erase any background left there.
Edge colours are cleaned automatically, so the old background doesn’t leave a tinted fringe against the new white. Always zoom in to check the result before you list a product: buyers zoom in too.
Common problems
The background looks grey, not white
The old background is still there in places, or you added a strong shadow. Check with Show removed parts, erase leftovers, and lower the Soft shadow slider.
The product’s own shadow was removed
That is expected: the AI removes everything that isn’t the product. Add a Soft shadow afterwards if you want one.
Labels or thin parts are missing
Turn on Show removed parts, zoom in, and paint them back with a small Keep brush.
The marketplace rejected my image
Read the rejection reason and compare with the current rules in your seller account. Common causes are a background that isn’t pure white, text added to the main image, or a picture that is too small.
Frequently asked questions
What background does Amazon require for product photos?
Amazon’s main image rules ask for a pure white background (RGB 255, 255, 255) with the product filling about 85% of the frame. Check the latest rules in Seller Central before uploading.
Should product photos be JPG or PNG?
Use JPG for white background photos: smaller files, accepted everywhere. Use PNG or WebP only when you need a see-through background to place on a coloured page.
Can I process a whole catalogue at once?
Yes, up to 30 photos per batch. Set the edges on one photo, click Use these edges for all photos, check each result, and download them together as a ZIP.
Do I need a light box?
No. A light box helps, but a plain surface, soft daylight and the AI background remover give clean white background photos for most products.
For a see-through version to use on banners, see making a background transparent, and for other colours read changing a photo’s background colour.
Make white background product photos now. Add your products, set them up once, and download the whole batch.
Comments
No comments yet. Ask a question or share a tip that helped you.