
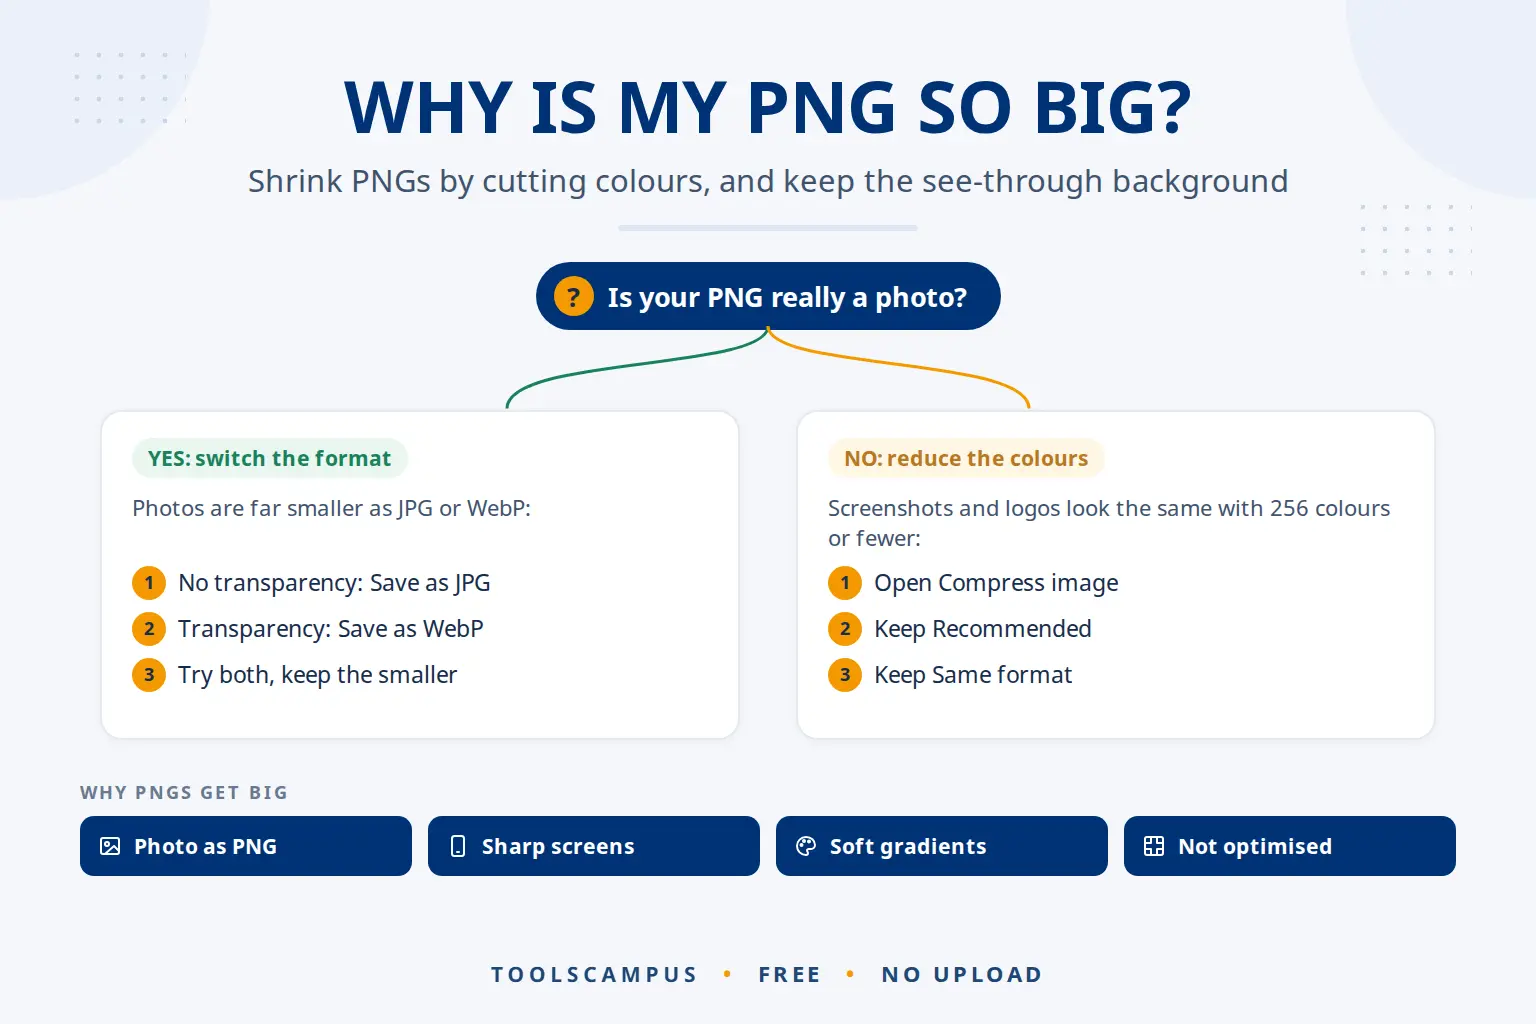
To reduce PNG file size without losing transparency, cut the number of colours to a palette of 256 or fewer. PNG optimisers work this way, and screenshots, logos and graphics usually look the same afterwards, transparent areas included. If the PNG is really a photo, convert it to JPG or WebP instead.
This guide explains why PNG files get so big, how colour reduction works, which level to choose, and when switching format saves more.
Shrink your PNG files now: free, no sign-up, and your pictures stay on your device.
Why is my PNG file so big?
PNG is lossless: it stores every pixel exactly. That makes the file size depend on two things, how many pixels there are and how varied their colours are. A few common causes:
| Cause | How to tell | What helps most |
|---|---|---|
| It’s a photo saved as PNG | Real-world scene, people, products | Convert to JPG or WebP |
| High-resolution screen | Screenshot from a Mac, phone or 4K monitor; very large width and height | Fewer colours, and shrink very large pictures |
| Soft shadows and gradients | Smooth colour fades, glows, blurred backgrounds | Fewer colours, or WebP |
| Saved without optimising | Simple graphic, but the file is still large | Re-packing (the Light level) |
Screens with sharp, high-density displays make screenshots with two or three times the width and height of what you see, which means four to nine times as many pixels. That’s why a simple screenshot from a phone can be several megabytes. For photos taken on a phone, see making photos smaller on iPhone and Android.
How colour reduction shrinks a PNG
A normal PNG can use any of about 16.7 million colours for each pixel. Most screenshots and graphics only use a few thousand, and many of those are nearly identical shades. Colour reduction picks the best 256 colours (or fewer) for that picture and redraws every pixel with the closest one. The result is an 8-bit PNG, which needs far less space per pixel.
Transparency is part of each palette colour, so see-through backgrounds and soft edges are kept. The file is still a normal PNG that opens everywhere.
How to reduce PNG file size (step by step)
- Open Compress image and add your PNG files (up to 50 at once).
- Under Compression, keep Recommended. It reduces each picture to up to 256 colours.
- Under Save as, keep Same format as the original so the files stay PNG.
- For very large screenshots that are only for a screen, tick Also shrink very large photos. It limits the longest side to 2,560 pixels.
- Click Compress images and check the size of each file in the list.
- Download the files one by one or all together as a ZIP. They are named like
diagram (compressed).png.
Colour reduction doesn’t always win. Pictures with long, smooth gradients can be smaller with every colour kept, so the tool tries both and keeps whichever file is smaller.
Which level to choose for PNG
| Level | What happens | Best for |
|---|---|---|
| Light (best quality) | Every colour kept, the file is only re-packed. Pixel for pixel identical. | Artwork, gradients, pictures you will edit again |
| Recommended | Up to 256 colours | Screenshots, logos, icons, charts |
| Strong (smallest files) | Up to 96 colours | Simple graphics with flat colours, thumbnails |
For a deeper look at lossless and lossy compression, see how to compress an image without losing quality.
When to switch format instead
If the PNG is a photo, changing the format beats any PNG trick:
- No transparency needed: choose Save as: JPG. Any see-through areas become white.
- Transparency needed, for example a product cut out from its background: choose Save as: WebP. It keeps transparency and is usually much smaller: Google’s WebP documentation puts lossy WebP with transparency at about a third of the PNG size.
- Not sure? Try both and keep the smaller result. The JPG vs PNG vs WebP comparison explains where each format works.
Keep screenshots of text as PNG, though. JPG and lossy WebP put a faint haze around letters.
PNG files from AI tools
Many AI tools save their results as PNG. Images from generators such as ChatGPT, Gemini and Midjourney are often full-colour PNGs of several megabytes, and AI background removers give you PNG cut-outs with transparent backgrounds. For a website or online shop, save AI photos as WebP, which keeps transparent backgrounds too; our guide to compressing images for faster web pages covers pixel sizes. For AI-made icons, logos and illustrations with flat colours, Recommended keeps them as PNG at a fraction of the size.
Going the other way, if you share screenshots with an AI assistant such as ChatGPT, Claude, Gemini or Copilot, a smaller PNG uploads faster and stays sharp enough for the AI to read text and numbers. Check what the AI reads against the original, and check the service’s privacy settings before sharing screenshots that show personal or work details.
Common problems
I see stripes in gradients or shadows
The picture needs more colours than the palette allows. Use Light, or save as WebP.
The edges of my logo look rough
Soft edges against a transparent background use many shades. Try Recommended instead of Strong, or Light for the cleanest edges.
The PNG didn’t get any smaller
It was already optimised. The list says already optimised, kept as it was, and you get the original back. If it’s a photo, convert it to JPG or WebP.
The transparent background disappeared
You chose JPG, which has no transparency. Compress again with Same format or WebP.
Frequently asked questions
How do I reduce PNG size without losing quality?
Use the Light level: it re-packs the file without changing a single pixel. For bigger savings, Recommended reduces colours, which usually looks the same on screenshots and graphics.
Why is my PNG bigger than a JPG of the same picture?
PNG keeps every pixel exactly, while JPG throws away detail the eye doesn’t notice. For photos that makes PNG several times bigger. For simple graphics PNG is often smaller.
Does compressing a PNG remove transparency?
No. Colour reduction keeps transparent and semi-transparent areas. Transparency is only lost if you convert the picture to JPG.
What is an 8-bit PNG?
A PNG that uses a palette of up to 256 colours instead of millions. It needs much less space per pixel and is ideal for screenshots, icons and logos.
Need screenshots or charts in a document? JPG to PDF keeps PNG pictures sharp inside the PDF (see turning PNG screenshots into a PDF). And if you export PDF pages as PNG with PDF to JPG at 300 dpi, this is a quick way to make them lighter.
Shrink your PNG files now. Transparency kept, files smaller, nothing uploaded.
Comments
No comments yet. Ask a question or share a tip that helped you.